Passport2Paint banner

Packing & Travel Tips for Artists Going on Painting Holidays and Workshops

Smart packing takes a lot of practice and ingenuity to be sure you have everything you need and nothing extra. One could say it is an art form in itself! This is especially true when traveling overseas for painting workshop holidays and plein air events.

I am often asked ‘What should I pack?’ by students, particularly those new to painting holidays and art journeys. Since many of my overseas workshops are filling now for next year’s holidays (10 new bookings for France and 4 for Italy workshops last week!), I want to alleviate unnecessary anxiety so here’s what to expect when packing for a painting holiday…

With the amount of traveling I do internationally, I have had my share of airport security issues and excess baggage fees~ here are some tips and options to help you pack for a painting holiday~ Hopefully my experience will assist you to avoid the dramas at the airport and keep your holiday on track with no nasty surprises!

There are a lot of products on the market but I am sharing with you here the ones I use. I have taken some pics of different painting setups I use to give you ideas for your journey and to tailor what you need for your particular art adventure. Although I am covering several types of painting setups here with links/information so you can follow up if interested, please keep in mind that keeping your painting gear to a minimum is the ultimate goal~ trust me when I say this really is a case of ‘less is more’.

Lightweight Day Pack for Plein Air quick sketching, watercolor or pen & wash studies. I use rock climbing carabiner clips to secure my digital camera and mini light.

#1 Setup

Contents of my lightest weight travel gear for plein air sketching and studies, including enamel watercolour field palette (see open in the header of this blog), Arches or Saunders watercolour paper block, builders rule for measuring angles, moleskine sketchbook, old slide casing viewfinder or  MVP viewfinder from Peggi Kroll Roberts, digital camera, business cards, masking tape, paper towels, spray bottle and water and a dot card sample of my Georgia Mansur Palette by Daniel Smith Watercolors

#2 Setup

Expanded contents of Day Pack for plein air sketching/watercolor/pen & ink (no tripod or easel) moleskine sketch book, Golden Crackle Paste, Daniel Smith Watercolor Ground and Masking Frisket , Georgia Mansur Palette by Daniel Smith watercolors, clutch pencil refills, bandaids, kleenex, deodorant, allergy medicine, ibuprofen, sunscreen, hat, chapstick and a wine opener of course!

Most of us take way more than we need and I am also guilty of that habit. The tips here are for painting en plein air so keep in mind you need to be able to carry whatever you bring. I am rethinking what is essential and will let you decide for yourself given your situation.

I always keep a checklist in my bag or backpack of items needed~ a handy reminder of what to pack. It is a master list that I pick and choose items from depending on the type of painting adventure I am embarking upon.

Georgia Mansur’s Plein Air Checklist for Watercolour & Acrylics (Master)

#3 Setup

Watercolour Plein Air with Light weight Slik F740 Tripod~ Enpleinairpro.com black support,  and James Coulter folding wooden shelf.

Art Box & Panel Wooden Easel fold out Shelf by James Coulter can also be used as a Palette for oils or acrylics. Attaches to most tripods by sliding onto legs and held in place by gravity.

#4 Setup

Plein Air Setup for Acrylics using the James Coulter Artboxandpanel.com wooden shelf and support with mid weight EasyL tripod.

Contents of Backpack using Plein Air Art Box & Panel gear, bungee cord for paper towels, panelroo panel carriers, big hat, MVP value viewfinder by Peggi Kroll Roberts, Golden OPEN acrylics, Golden Gels & Texture Pastes, Creative Mark Acryl-a-miser Acrylic Palette, zip up brush holder.

#5 Setup

Plein Air Setup for Acrylics using the James Coulter Artboxandpanel.com wooden shelf and support with mid weight EasyL tripod.

Contents of Backpack for #5 Plein Air Setup using the EasyL pochade box, Creative Mark Acryl-a-miser or watercolour palette, MVP View finder, hanging water or turps can, 2 slots behind box for wet panels.
Plein Air Panel Carriers by Panelroos@yahoo.com. I have not tried them but I have heard Panelpak also make carriers that work well.
Print your own labels to alert customs officials that you are taking care to obey the flight safety rules. EasyL pochades and tripods can be purchased from Artwork Essentials online.

#6 Setup

STRADA aluminium durable easel and Manfrotto sturdy tripod built to withstand abuse and rough treatment in airports and overseas travel. Cleverly designed by fellow plein air painter, Bryan Mark Taylor to be streamlined and durable.

Plein Air Painting Gear, contents of backpack for painting acrylics en plein air (tripod in separate bag). I sometimes use adhesive velcro strips for windy days when i need extra security for lightweight panels on all my setups. I only use rubber gloves when painting in oils.
Rolling Backpack to carry Plein Air Gear and separate Tripod carrier

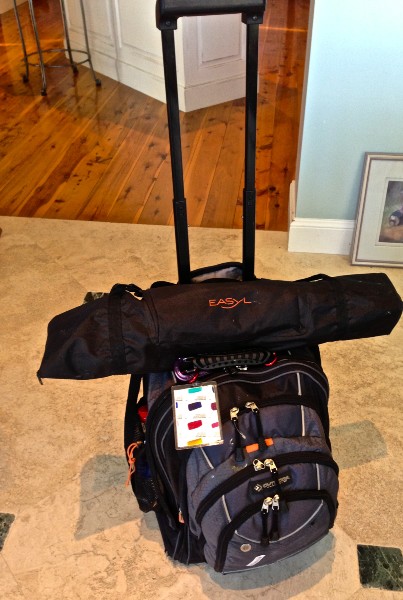
Having a good backpack to carry your gear is critical~ I have tried many and the one I like the best is the affordable Outdoor Products rolling backpack from amazon.com because it is large enough to carry any of the setups I have outlined above, has a wide opening to slide in/out quickly, good in-line skate wheels, lots of useful compartments and sturdy telescopic handle for ease through airports. It also has a hidden zip at the back with padded straps for carrying on your back for those times when you are on cobblestones, lots of stairs, or rough terrain where rolling is not possible.

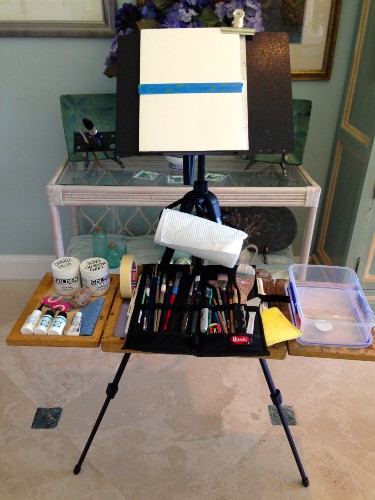
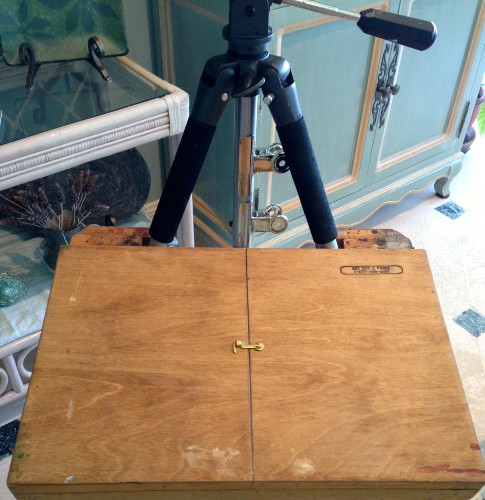
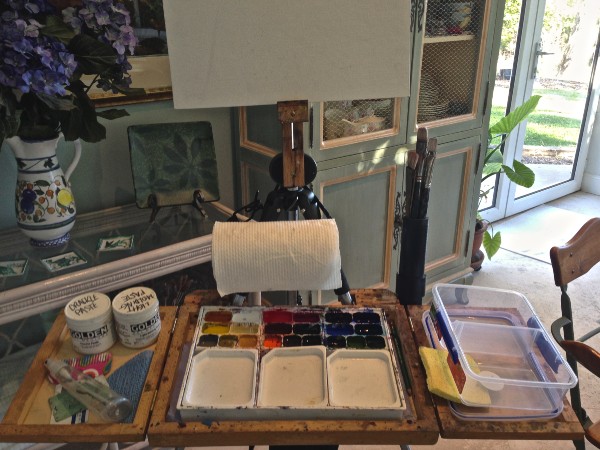
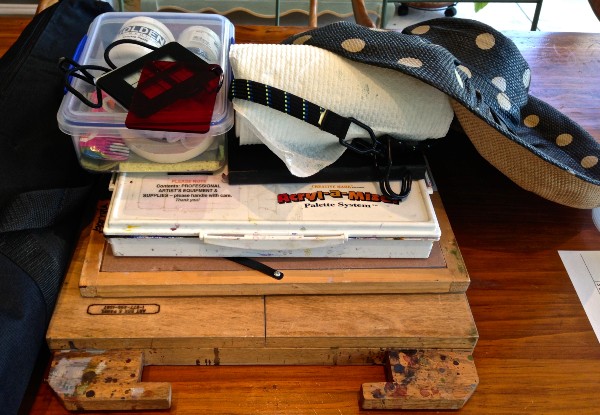
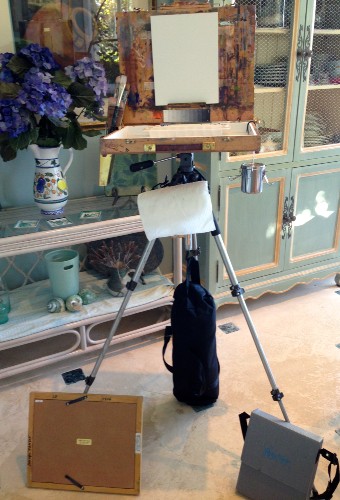
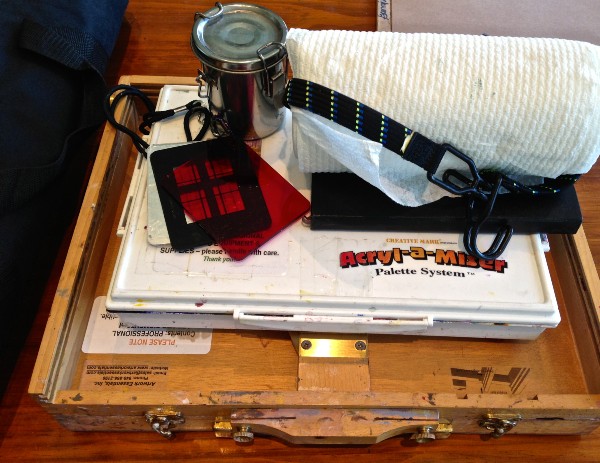
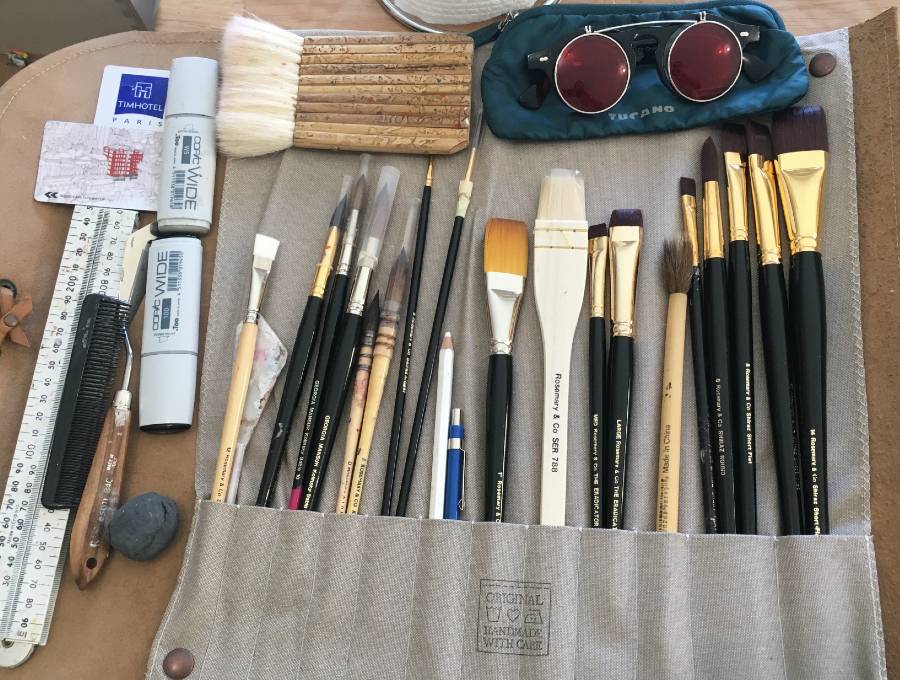
Tripod and Brushes can be carried in your padded tripod bag and I wrap tripod in bubble wrap to protect it further. Brushes can be slipped in the PVC pipe tube ordered from James Coulter Artboxandpanel.com~ it attaches to the back of the box with a screw and is easy to manage. The mast for the Art Box and Panel also fits into my tripod bag nicely.

So let’s look at a few points to consider:

One thing to remember when speaking to airport officials is never say the word ‘Paint’ as this seems to be a red flag word for customs and security officers~ instead say they are professional ‘artist pigments’ or ‘artist colours’ and let them know there are no solvents in them and you have checked the flash points on the paint manufacturer’s website to confirm this fact.

Make sure you print out the MSDS safety sheets from your paint company’s website to avoid any hassles with the TSA officers in airports~ pack this with the paints and keep a copy with you. The sheets tell flash points, flammability and other information needed for safety on flights. For air travel, flammable liquids have a flash point 140 degrees or below.

If you are using oils and are taking a turp can with you, make sure it is thoroughly cleaned with soap and does not smell of solvent before you pack it. Put a Ziploc baggie inside the can to use as a temporary liner when painting on location, making it easier to dispose of the baggie and contents properly before you fly again. Again, check that it is clean and not smelling like solvent, which will give you grief if officials pull you aside. Murphy’s Liquid Soap is a good option to get any oil paint out of clothing if like me, you get a bit messy. I basically have 2 types of clothes: those that have paint on them…..and those that are ABOUT to have paint on them!

Generally speaking, I would not travel with solvents or medium on flights, rather purchase at destination or send hazardous items directly to venue via ground shipping to avoid issues. If you are using oil paints, consider other alternatives like walnut oil, baby oil gel or other non-hazardous materials for flights if you are not sure you can get the solvents, turps or items needed where you are going.

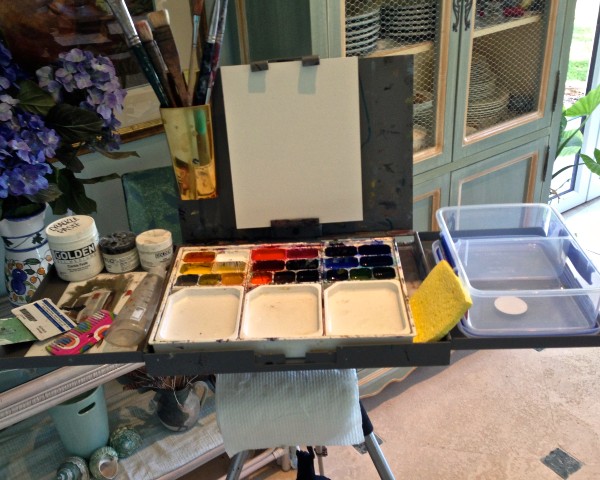
Better yet, travel with watercolour or acrylics so you don’t have to worry about solvents, turps and other hazardous materials ~ the fact that it all washes up in water is a good enough reason for me to use them exclusively whilst traveling!

Most paints are not considered hazardous but always better to be safe than sorry. Pack your paint in your checked bag (NOT your carry on) and make sure your scissors, or pencil sharpener/blade/palette knives are not in the carry on luggage.

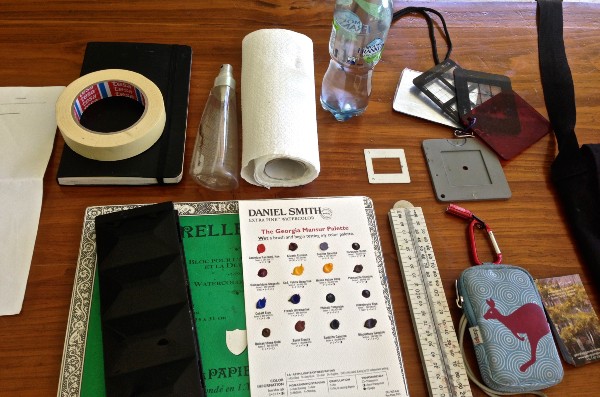
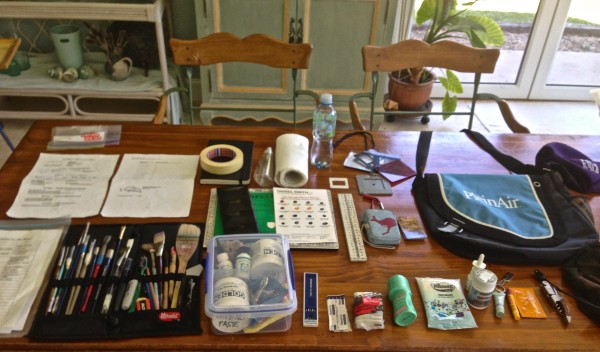
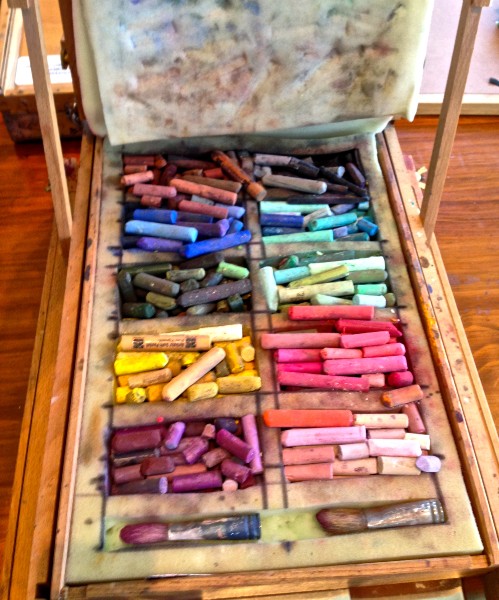
Wrap each tube of paint in bubble wrap to prevent tubes puncturing each other in flight, tape together and seal in a double Ziploc baggie in case of lids vibrating off or pressure causing paints to do things they are not meant to do~ believe me you do NOT want a Cad Yellow explosion in your luggage~ its not pretty to clean up when you arrive at your destination!  I enclose my wrapped spare tubes of paint in a plastic/tupperware type container to double guard against jostling in suitcase and for all tubes and jars I put a seal of tape around the lids to contain any leakage. I also pack a roll of clear packing tape in an easy to reach side pocket in case I do have to open everything and repack it for customs officials.

French Easel for Pastels~ my least favourite setup….it is heavy and setting it up is like wrestling with an octopus!! I only use this when i am traveling by car and usually put it on my tailgate rather than set it up properly.
If I am working in pastels, this is my set up. I cut foam rubber wells to store the pastels in colour families. Generally speaking I don’t like traveling with pastels as they are messy, break easily and difficult to transport without smudging paintings. However, I wanted to show this so pastellists don’t feel left out. If you have a better setup for travel please let me know. I only paint in pastel around home and enjoy them in my studio.

Traveling with painting gear also means that you have less space for clothing, shoes, toiletries and other normal stuff you would need for travel so re-think what you are packing.  A week or two before flying, lay everything out on the bed in combinations of what can be worn together~ if you can’t double or triple duty each item perhaps it is not the best choice.

Take lightweight, quick drying layers that will be easy to wash out and hang to dry in the sink if there are no laundry facilities where you are going~ most places have this service available but it is better (and more economical)if you don’t have to rely on it. I roll my clothes and try to bring garments that are meant to look wrinkly!

Another handy tip is do not pack any laundry detergent that looks anything remotely like white powder…..sniffer dogs and airport security will take a sudden interest in you!  Perhaps using your shampoo for dual purposes such as body wash/detergent/whatever else will eliminate the need for so many bottles in your toiletries kit. I also like to use samples from cosmetic companies for lotion, sunscreen and other items that can be discarded as you go. Always remember to keep your liquids to 100 mls or less in your carry on bag and they must be in the regulation ziploc baggies provided at the airport. (I once had tubes of paint confiscated in Frankfurt airport because I had several baggies of correct sized tubes but  apparently you are only allowed one baggie~ I pleaded with the officer to allow me to choose which colours I could keep as I didn’t know for sure if I would find the paint I needed where I was going~ it didn’t matter to her but it mattered a LOT to me!). Another good reason to carry all your paint in your check-through bag.

I am posting in advance the spare tubes of paint and panels I will need directly to the workshop venues to avoid overweight and excess baggage fees. Just keep in mind any duty or taxes that may be applicable in whichever country you are posting to and address it to yourself or in care of the venue organiser. I also ask the supplier to send the invoice to my home and not include it in the shipment to avoid attracting duty fees.

One thing I always pack in my carry on bag is a lightweight change of clothes ~ if your luggage goes missing at least you can alternate between what you are wearing whilst you wash the other set! Put this in a foldable zippered nylon carry bag which will also double as a dirty clothes bag or carry bag for your shopping/rubbish in the field/counterweight on windy days, etc.

I usually also pack a soft scarf, light jacket, earplugs and eye mask for the flight~ sometimes the temperature on flights fluctuate dramatically and I like to use the scarf over my head when trying to sleep~ it also acts as a filter for the air recirculating in the cabin, protecting you somewhat from germs, noise and bad smells if you are seated next to the loos!

Check airline specs for luggage weights and sizes to be sure you are within their guidelines, including any connecting flights, which may have different rules.I am packing a hard shell zippered luggage with 4 wheels to spin and coast nicely through airports and stays balanced without tipping over. I got mine at Costco but there are plenty of others on the market. It has 2 zippered sections where I use one side for my painting gear and the other side for my clothes, shoes, toiletries and everything else. I also have a luggage scale to ensure I am within the weight limits, this can be packed in your carry on bag or backpack.


Last but not least we need to talk about being connected…..

I usually purchase a prepaid plan of mobile and data at home and then connect it to local network as soon as I land to let my family know I arrived safely. You can also purchase global simcards at airports but I like to have it ready to go so I don’t lose time waiting in line~ usually I just want to get to my hotel, have a hot shower and sleep horizontal after being on a long flight! If you don’t want to purchase data you can usually get online at your hotel or internet cafe so don’t stress over this. Check the Dept of Immigration and Embassies to see if you need visa, immunisation documentation, or reciprocity fees. Most countries do not require this but much better to be prepared than be caught out in a country where you might not speak the language and/or are outside of office hours. I always carry travel insurance so keep that and a photocopy of your passport separate from your travel documents in case of loss or theft.

This article is my attempt to break down for you what is available, to help you decide what you actually want and need. I generally take a watercolour day pack and an acrylic tripod setup when teaching so I am prepared for most situations but you may choose to just take a day pack or a combination of what I have shown here. There are many more options available of course. And at the end of the day, when you think you are packed and ready to go, take my husband’s suggestion…..take out half of what you packed and leave room for bringing something cool home with you!

If you have enjoyed this article please share it and if you have any handy tips that you’d like to share, please comment below~ always love to hear how people do things differently or more efficiently!

Leave a Comment

Your email address will not be published. Required fields are marked *